How to feed garlic after winter: 12 best spring fertilizers

We discuss the timing and rules for feeding winter garlic in the spring. We offer a description of the best fertilizers.
Immediately after the snow melts in the garden, the first bright green garlic shoots appear. They are not afraid of cool weather or return frosts. Some gardeners believe that hardy onions will grow even without special care. But this is not the case. Although the crop is unpretentious, it still needs to be cared for. This is the only way to get a good harvest. Let’s figure out how to feed garlic after winter and when to do it.
All about spring feeding of garlic
When to apply fertilizer
Unlike spring varieties, winter varieties are planted in the fall in pre-fertilized soil. In the spring, with the first warm days, they start to grow. It is essential to understand that the food reserves laid down in the fall during planting are significantly depleted over the winter and need to be replenished. It is best to do this in three stages.
- First. A few days after the snow melts. It is best to apply nitrogen fertilizers, which stimulate the rapid growth of green mass. Important point. Usually, fertilizers are used to moisten the soil, but in this case, preliminary watering is not necessary — the soil is still sufficiently moistened after melting. Excessive waterlogging at sufficiently low temperatures will lead to root rot.
- Second. Carried out two or two and a half weeks after the first. This time, nitrogen compounds are applied again, but necessarily with a small amount of phosphorus and potassium preparations. They are necessary for the plant’s normal growth and bulb formation.
- Third. Takes place at the end of May or the first weeks of June. It depends on the region. At this time, the garlic head is actively growing, and the feather has grown well and become dense. The crop needs phosphorus and potassium. Nitrogen is not required at this stage — it stimulates the growth of greenery. The plant spends its energy on developing leaves, and the bulbs grow small and tasteless.
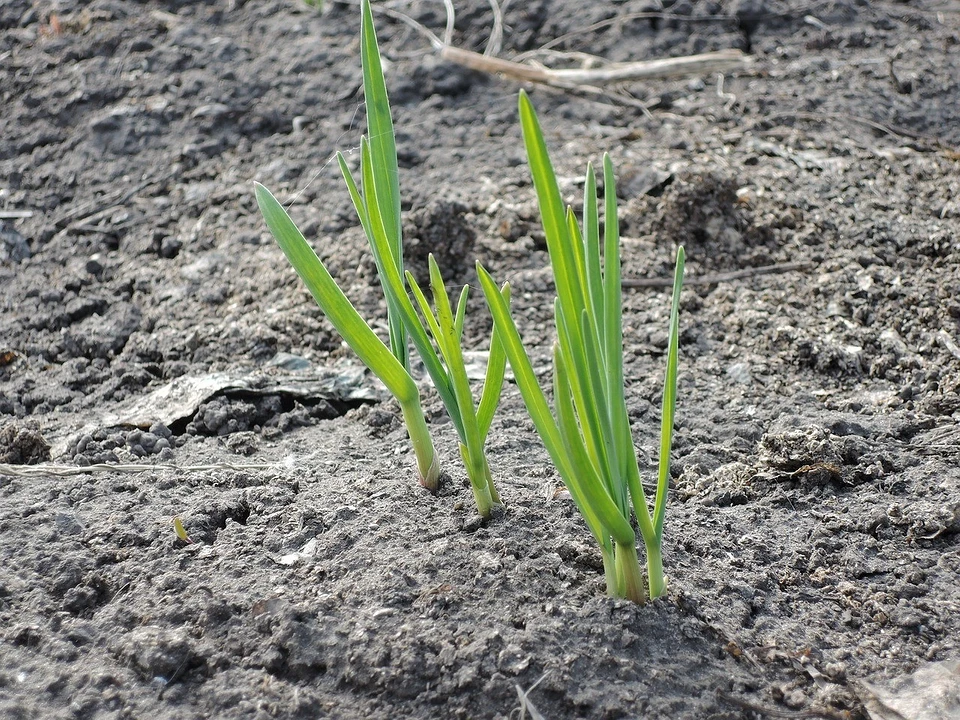
All about spring feeding of garlic | Pixabay

The best way to feed winter garlic
Mineral preparations
Chemical compounds are produced as mono- or complex fertilizers. Here are the best options for feeding onions and garlic after winter.
Ammonium nitrate
Contains 34% nitrogen. Easier to apply in liquid form. For 2.6 gallons (10 liters) of water, take 0.88 oz (25 g) of nitrate and mix well. After a while, it will dissolve. Water the plants with the liquid at a rate of 2.4 gallons per 100 sq ft (liters per square meter).
Urea
Nitrogen-containing preparation. It is most often applied in liquid form. One of the best options for feeding garlic in early spring. To prepare the working solution, dissolve 0.71 oz (20 g) of granules in 2.6 gallons (10 liters) of water. After vigorous stirring and dissolution, water the beds—application rate: 2.4 gallons per 100 sq ft (liters per square meter).
Nitrophoska
A complex preparation containing potassium and phosphorus in addition to nitrogen. Suitable for second feeding. Pour 0.71 oz (40 g) of nitrophoska into 2.6 gallons (10 liters) of warm water, stirring vigorously until dissolved. Water the beds with the resulting liquid. Apply about 2.4 gallons per 100 sq ft (one liter of solution per square meter).
Superphosphate plus potassium sulfate
Suitable for the third feeding of the season. The two preparations cannot be applied together; they are used alternately. First, could you prepare a potassium sulfate solution? To do this, dissolve 1.06 oz (30 g) of granules in 2.6 gallons (10 liters) of water and water the plants. The norm is 2.4 gallons per 100 sq ft (1 liter per square meter).
After two or three days, prepare a solution of superphosphate. It does not dissolve well, so it is diluted in stages. First, pour 0.71 oz (40 g) of the preparation with hot water, stir, and leave until dissolved. Then add 2.6 gallons (10 liters) of water. Water the plants; the application rate is the same.
Comprehensive specialized fertilizers
Products developed specifically for onions work well. Their composition is designed to help the crop produce maximum yields. These include, for example:
Espoma Onion-Tone
Manufactured in: USA
Type: Organic complex fertilizer
NPK: 3-4-4
Features:
- Developed specifically for onions and garlic
- Contains calcium, sulfur, and micronutrients
- Chemical-free, safe for soil✅ One of the most popular onion fertilizers in the US
Down To Earth Bulb & Flower Fertilizer
Manufactured: USA
Type: organic
NPK: 3-9-4
Suitable for:
- onions
- garlic
- shallots
- leeksPlus: high phosphorus content for bulb formation
Dr. Earth Bulb Food
Manufactured: USA
Type: organic, with probiotics
NPK: 3-15-2
Features:
- Stimulates root growth and bulb size
- Suitable for onions, garlic, and ornamental onions
Lilly Miller Bulb & Bloom Food
Manufactured: USA
Type: mineral
NPK: 10-10-10
Features:
- Versatile, often used for onions
- Fast effect⚠️ Not organic
Jobe’s Organics Bulb Fertilizer
Manufactured in: USA
Type: organic
NPK: 2-5-3
Suitable for:
- onions
- garlic
- bulbs
Form: granules, convenient for home gardens
They are diluted and used exactly as instructed on the packaging. Changing the concentration is highly undesirable.
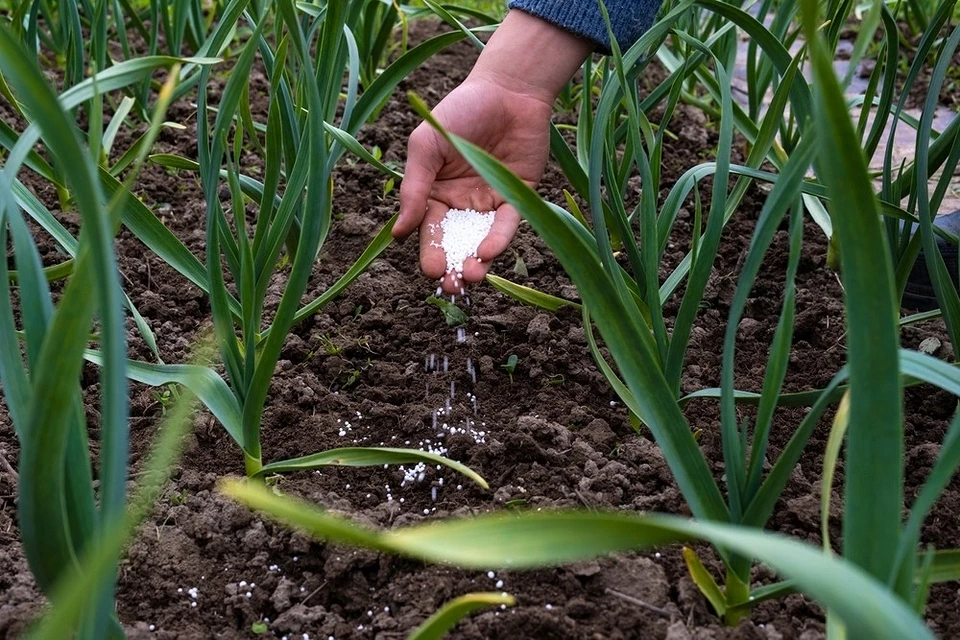
Mineral preparations | ShutterStock

Organic
Natural organic fertilizers are considered the safest for the environment and human health.
Chicken manure
Contains large amounts of nitrogen, as well as phosphorus and potassium. Not used fresh. It can be applied when digging beds in the fall, along with peat and humus. In spring, it is used as a nutrient solution. To prepare it, pour 5.3 gallons (15 liters) of water over 2.2 pounds (1 kg) of organic matter and mix thoroughly. After complete dissolution, water the plants at about 4.9–5 gallons per 100 sq ft (2 liters per square meter). Important point. If the liquid gets on the feathers, it must be washed off; otherwise, it will cause burns.
Mullein
Organic matter contains a large amount of nitrogen, which is necessary for plants in the early stages of development. Therefore, it is one of the best options for feeding garlic after winter if the leaves turn yellow. But it cannot be used fresh. The mass is fermented. To do this, place it in a stainless steel or plastic container, fill it with water at a 1:5 ratio, mix well, cover tightly with a lid, and store in a warm place.
Leave to ferment for 10-14 days. After that, strain and dilute in a 1:10 ratio. Water the beds at about 24.5 gallons per 100 sq ft (one bucket per square meter).
Ash powder
Obtained after burning wood and plant residues such as sawdust, shavings, etc. Contains a complex of micro- and macroelements necessary for onion development and lowers the soil mixture’s acidity.
You can feed with ash in different ways. Dry powder is poured into pre-made furrows between the heads, covered with soil, and watered. You can also dust the garlic feathers. This will protect them from pests. The solution for watering is prepared by dissolving a glass of powder in a bucket of water. Mix everything well and water the beds. For foliar feeding, pour 0.7 pounds (300 g) of powder into 0.26 gallons (1 liter) of water, stir, bring to a boil for 30 minutes, and strain. Dilute the liquid with water to a volume of 2.6 gallons (10 liters). For better adhesion, add a little soap shavings, mix, and spray the plants generously.

Ash powder | Pixabay

How to feed garlic after winter using folk remedies
Yeast
Liquid fertilizer is prepared by combining 0.2 pounds (100 g) of pressed yeast with 2.6 gallons (10 L) of warm water. Mix everything, let it sit for a day, then strain. Water the beds with the liquid at about 3.7 gallons per 100 sq ft (1.5 liters per square meter). You can prepare yeast fertilizer by adding organic matter. Here’s how to do it. For a bucket of water, take 0.35 oz (10 g) of yeast, 1.1 lb (500 g) of ash powder, 5-7 tablespoons of sugar, and 1.1 lb (500 g) of chicken manure. Mix the mixture, leave it for 3-4 hours to ferment. After that, strain it, dilute it 1:10, and water the plants.
Ammonia
It contains a large amount of nitrogen and also repels insect pests with its unpleasant smell. It is best to use ammonia as a foliar fertilizer. The working solution is prepared from 2.6 gallons (10 liters) of water and 0.84 fl oz (25 ml) of alcohol. Mix everything and add soap shavings. It is better to use laundry soap and dissolve everything in warm water. Spray the garlic feathers generously with the finished mixture.
Green infusion
Prepare from picked weeds or any other grass, but without ripe seed pods. In late April-early May, nettles and dandelions are used to prepare the infusion. The grass is chopped, then poured with water, placed under a weight, and covered with a lid. Please leave it to ferment. This will take four to seven days. It depends on the ambient temperature — the warmer it is, the sooner you can apply the fertilizer. Strain the finished mixture and dilute it with water at a 1:10 ratio. Water the beds.
Bread infusion
Rye crackers make a good fertilizer for bulbous plants. There are no exact proportions here. Crush the dried bread pieces, pour water over them, and let them steep. Water the plants with the resulting infusion.
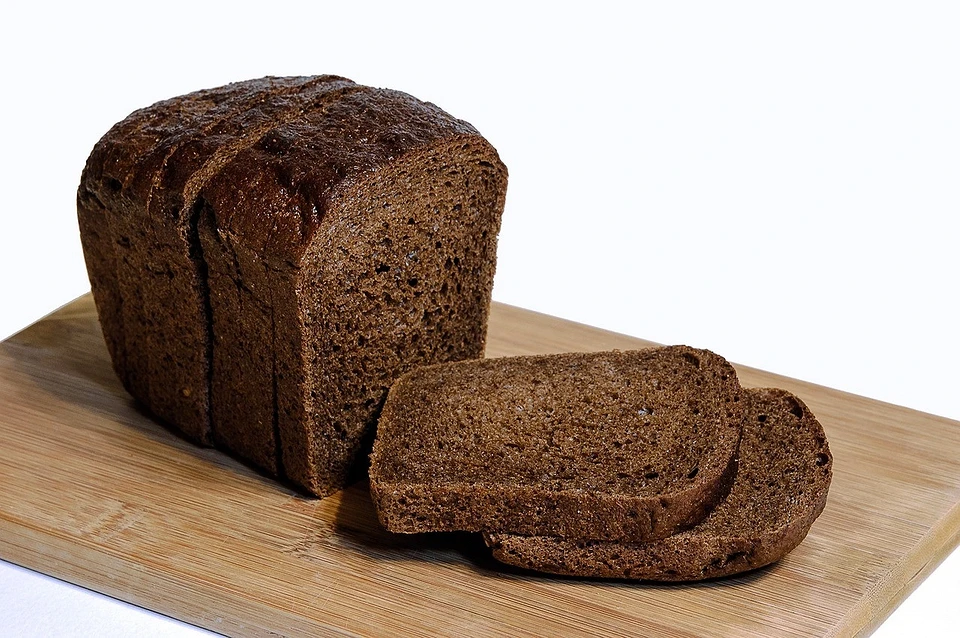
Bread infusion | Pixabay

Rules for applying fertilizers
Regardless of which solution you choose, there are specific rules for applying fertilizers. If you follow them, the fertilizer will be absorbed as effectively as possible and will not harm the plant.
- Dry fertilizers are evenly distributed over the surface or placed in shallow grooves between the rows of heads and sprinkled with soil. After that, water generously.
- The nutrient solution is poured directly under the root, without touching the feathers. It is best to use a watering can with a narrow spout for this. If the solution gets on the leaves, they need to be rinsed with clean water.
- Liquid compositions are poured onto dry soil. It can only be moistened beforehand in case of prolonged drought. The plant does not like overwatering, as it can cause the roots to rot.
- Foliar feeding is carried out in the evening or in cloudy, but not rainy, weather. Otherwise, the drops of the preparation on the leaves will act as a lens, and the plants will get burned.
- The temperature of the liquid nutrient solution should not differ significantly from the ambient temperature. This is most comfortable for garlic. If there is a significant difference, it will experience unwanted stress.
Rules for applying fertilizers | Pixabay

It is not difficult to feed garlic correctly. For best results, experienced gardeners advise alternating between organic and mineral complexes. It is essential to strictly observe the dosage and timing, regularly loosen the soil, and water the crop. Then the garlic will reward you with a bountiful harvest of large and fragrant heads.
❓ Questions and answers

How often and how long should I fertilize garlic in spring?
Apply fertilizer every 2–4 weeks through spring, but stop by late spring/early summer (before bulb swelling and harvest time), because too much nitrogen later can reduce bulb size.
What kinds of fertilizers work best for spring garlic feeding?
High‑nitrogen options like blood meal or fish emulsion promote early leafy growth. Later, adding some phosphorus and potassium supports bulb development. Organic options like compost and balanced bulb fertilizers are also good.
Can I over‑fertilize my garlic?
Yes — too much fertilizer (especially nitrogen) or fertilizing too late in the season can lead to lots of leafy growth but small bulbs. Always follow package directions.
Do I need to fertilize garlic in winter?
No — garlic planted in the fall relies on nutrients worked into the soil then. The spring is when additional feeding matters most.
Hi, I’m Ben Carter!
I’m a certified organic vegetable specialist with over 12 years of experience. I grew up on a farm in Iowa and have helped hundreds of gardeners grow bountiful harvests without unnecessary chemicals. On this site, I share my proven methods. If you have any questions, leave them in the comments!


