8 rules for planting a hedge

During work, specific rules must be followed to ensure that this impressive element of the cottage landscape successfully fulfills its purpose.
There are only a few rules, but they are all essential!
Rule 1: Roots must not dry out
When planting plants with an open root system, the roots must not dry out. Therefore, dug or purchased seedlings must be placed in a plastic bag filled with moist sawdust before planting, and the bag must be tied tightly above the root system.
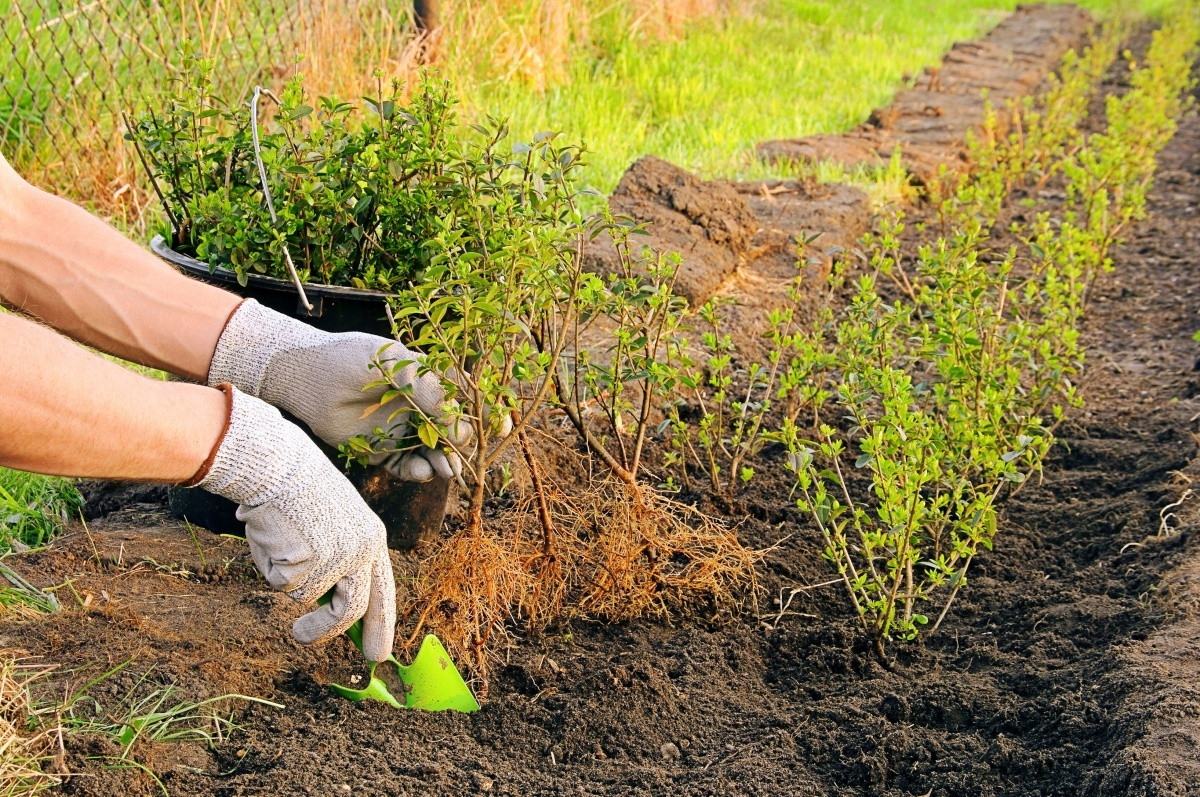
Planting a hedge

Rule 2: Trim the roots before planting
Before planting, carefully inspect the plants’ roots to ensure they are healthy and disease-free. Trim any dry tips and remove any damaged parts. When planting, spread out the root system.
Rule 3: Use clay slurry
To help transplanted plants take root more effectively, dip their roots in a slurry made from soft clay and mullein. To learn how to create and use it correctly, you can just read the article 15 Most Common Mistakes When Planting Plants, where point 10 is devoted to this issue. By the way, don’t ignore the others either.
Rule 4: Consider the characteristics of the species
The density depends on the plants’ biological characteristics, the type and height of the hedge, and the number of rows. Shade-tolerant, slow-growing species and plants with narrow crowns are planted more densely than fast-growing, light-loving species with wide crowns.
Denser planting can be used in shaped hedges, but in free-growing hedges, it should not be too thick. Shrubs and trees will grow, and they mustn’t crowd each other out. To decorate the space between young plants, consider using annual flowers or fast-growing, herbaceous perennials.

Rule 5: Maintain distances
It is essential to maintain the recommended spacing between plants in hedges, whether single-row or multi-row. It is important to remember that in a multi-row hedge, plants should be arranged in a checkerboard pattern.
- Hedge type: shaped walls:
Distance between plants in a row: 31.5 – 47 inches;
Distance between rows: up to 3.3 feet.
- Hedge type: free-growing walls:
Distance between plants in a row: 3.3 – 6 feet;
Distance between rows: up to 6.5 – 10 feet.
- Hedge type: shaped hedges:
Distance between plants in a row: 2 – 3 feet;
Distance between rows: 2 – 3.5 feet.
- Hedge type: free-growing hedges:
Distance between plants in a row: 1.6 – 2 feet;
Distance between rows: 2 – 3 feet.
- Hedge type: shaped borders:
Distance between plants in a row: 0.4-0.6 feet;
Distance between rows: 0.6-0.8 feet.
- Hedge type: free-growing borders:
Distance between plants in a row: up to 1 foot;
Distance between rows: 1 – 1.3 feet.
Rule 6: Water and mulch
The soil around planted plants must be well compacted, watered, and mulched with sawdust, crushed bark, or peat to reduce moisture evaporation and suppress weed growth.
8 rules for planting a hedge

Rule 7: Prune the plants
Plants root better when pruned after planting. This is done at the same height from the ground along a stretched string, as well as on the sides at 1/3 or 1/2 of the average length of the shoot. Note: if you’re using material that isn’t explicitly designed for hedges, you’ll need to cut the planted plants to a height of 8-12 inches above the ground.
Rule 8: Choose the direction
If the primary purpose of the future hedge is to protect against the wind, the rows of plants should be planted perpendicular to the direction of the wind.

❓ Questions and answers

How far apart should I space hedge plants?
Spacing depends on the type and species of the hedge. For formal hedges, plants might be spaced closer (e.g., 2–3 feet apart), while for natural or privacy hedges, spacing can be wider (e.g., 3–6 feet). Always follow the biology of the species used and local guidelines.
Would you like me to prune immediately after planting?
Yes — a light initial pruning helps balance root-to-shoot ratio, reduces water loss, and encourages even growth. Cut the top to a manageable height and trim side branches slightly, following the method described in the article.
How should I water and mulch a newly planted hedge?
After planting, water deeply to settle the soil around the roots. Then, apply a layer of mulch (e.g., bark chips, shredded bark) around the base to retain moisture, suppress weeds, and protect the roots against temperature swings. Avoid letting mulch come into direct contact with the stem.
Which direction should I orient my hedge?
The hedge rows should often be planted perpendicular to the dominant wind direction (if wind protection is an aim). Also consider sun exposure: many hedges do better when they receive balanced light rather than extreme shadow or full sun all day.
Arthur Lansley: Certified arborist with 15 years of experience. Specialist in trees, shrubs, and landscape design. I can help you choose, plant, and maintain your trees.


1 Response
[…] 8 rules for planting a hedge […]